How to Drill Holes in Tiles Without Cracking – The Ultimate Guide with Hole Saws
Drilling holes in tiles can be a daunting task, especially when considering how fragile and prone to cracking they can be. Whether you’re installing fixtures in your bathroom or kitchen, drilling a precise and clean hole without damaging the surrounding tile is essential.
Using the right tools and techniques can make all the difference. This guide will focus on how to use a hole saw to drill holes in tiles effectively and safely, ensuring your project is completed smoothly and professionally.
1. Why Drilling Tiles Can Be Challenging
Tiles are typically made from hard, brittle materials such as ceramic, porcelain, or stone, which makes them prone to cracking under stress. Unlike materials like wood or drywall, tiles don’t flex when subjected to pressure, which can cause them to break if drilled improperly. Additionally, the slick surface of tiles can cause regular drill bits to slip, leading to uneven holes or damage.
2. The Importance of Using a Hole Saw for Tile Drilling
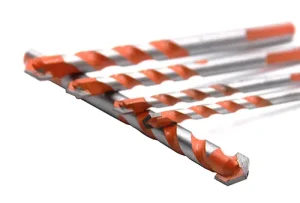
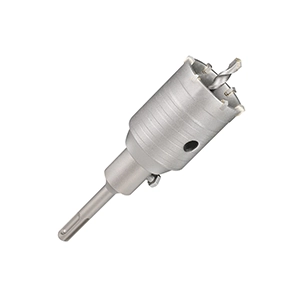
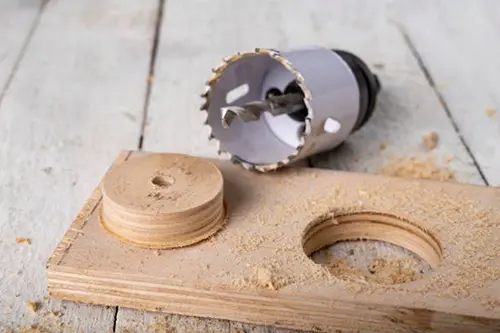
A hole saw is an ideal tool for drilling larger, circular holes in tiles. Unlike standard drill bits, hole saws are designed with a hollow center and have a ring of sharp teeth or abrasive material at the edge, which grinds through the tile as it rotates. For tile drilling, a diamond-tipped hole saw or a carbide-tipped one is most effective due to their ability to cut through hard surfaces with minimal effort.
Key Benefits of Using a Hole Saw:
- Clean, Precise Holes: The design of a hole saw ensures that the cuts are clean and consistent, reducing the risk of cracking.
- Variety of Sizes: Hole saws come in different diameters, making them versatile for various projects.
- Durability: Diamond-tipped hole saws are particularly durable and can handle multiple uses without losing effectiveness.
3. Step-by-Step Guide to Drilling Holes in Tiles Without Cracking
Step 1: Gather Your Tools and Materials
- Hole Saw (Diamond-Tipped or Carbide-Tipped): Choose the appropriate size for your project.
- Drill: Ensure you use a variable speed drill with a hammerless setting to avoid excess pressure.
- Masking Tape: Helps prevent the drill bit from slipping on the tile surface.
- Water Spray Bottle or Coolant: Keeps the hole saw cool and prevents overheating.
- Protective Gear: Safety glasses and gloves for protection against debris.
Step 2: Prepare the Tile Surface
- Clean the Tile: Make sure the tile is clean and free from dust or debris. This ensures that the masking tape adheres properly.
- Mark the Drilling Spot: Use a pencil or marker to indicate where you want the hole.
- Apply Masking Tape: Place a piece of masking tape over the area to be drilled. This will help prevent the drill bit from slipping when you start drilling and provides extra stability.
Step 3: Begin Drilling
- Start at a Low Speed: Place the hole saw on the marked spot at a 45-degree angle. Start drilling slowly to create an initial groove in the tile. This helps guide the hole saw when you switch to drilling at a full 90-degree angle.
- Adjust to 90 Degrees: Once the groove is established, bring the drill to a perpendicular position (90 degrees) and continue drilling.
- Apply Light Pressure: Let the hole saw do the work. Applying too much pressure can crack the tile. Maintain a steady, moderate force throughout the process.
Step 4: Keep the Hole Saw Cool
- Use Water or Coolant: Frequently spray water or coolant on the hole saw while drilling to prevent overheating. Overheating can cause the tile to crack and can damage the hole saw.
- Stop Periodically: Pause every 10-20 seconds to let the hole saw cool down and prevent excessive heat buildup.
Step 5: Complete the Drilling
- Finish with Care: As the hole saw approaches the other side of the tile, reduce the drilling speed to avoid chipping.
- Remove the Piece Gently: Once the hole is fully drilled, remove the cut piece gently from the hole saw.
4. Tips for Avoiding Tile Cracking
A. Use a Guide Jig A guide jig or a drilling template can help keep the hole saw steady, especially if you are new to drilling tiles. It ensures a centered and controlled start to prevent slipping.
B. Avoid Hammer Mode Never use the hammer setting on your drill when drilling through tiles. Hammer mode can create sudden force that shatters or cracks the tile. Always use a standard drilling mode.
C. Choose the Right Hole Saw Opt for a high-quality diamond-tipped or carbide-tipped hole saw, as these are specifically designed for hard materials like tiles. Cheaper hole saws may not cut as cleanly and can wear out quickly.
D. Drill at a Consistent Speed Avoid sudden changes in drilling speed, as this can cause uneven pressure on the tile. A smooth, consistent speed helps maintain control and prevents cracking.
5. Common Mistakes to Avoid
A. Applying Too Much Pressure One of the most common mistakes is pushing too hard on the drill. This can lead to cracking, especially as the hole saw nears the end of the tile.
B. Drilling Too Fast While it may be tempting to drill quickly to finish the job, drilling too fast can generate excessive heat, leading to cracks. Always drill at a moderate pace and keep the bit cool.
C. Skipping the Coolant Overheating is one of the primary causes of tile cracking during drilling. Using water or a coolant is essential to keep both the hole saw and the tile cool.
6. Conclusion
Drilling holes in tiles without cracking requires the right tools, proper technique, and careful attention to detail. A hole saw, especially a diamond-tipped or carbide-tipped one, is an excellent choice for achieving clean, precise holes. By following the steps and tips outlined in this guide, you can successfully drill holes in tiles for your next home improvement project without the stress of damaging your tiles.
For the best results, always use high-quality tools and practice patience. Remember, the goal is not only to drill a hole but to do so without compromising the integrity of your tiles.